Angular7 + Bootstrap4でWebアプリを作ろう - サービス追加 その1
こんにちはふるてつです。
3月から後輩と二人で社内 Angular もくもく会もはじめました。
これからは AWS と同様に Angular についても、もくもく勉強した内容を書いていきたいと思います。
基本的にはこれまで作ってきたアプリの続きになりますが、作業時間が限られるので若干内容が少なくなるかとは思います。
今回は復習もかねてチュートリアルを参考にサービスを追加しました。
サービス追加
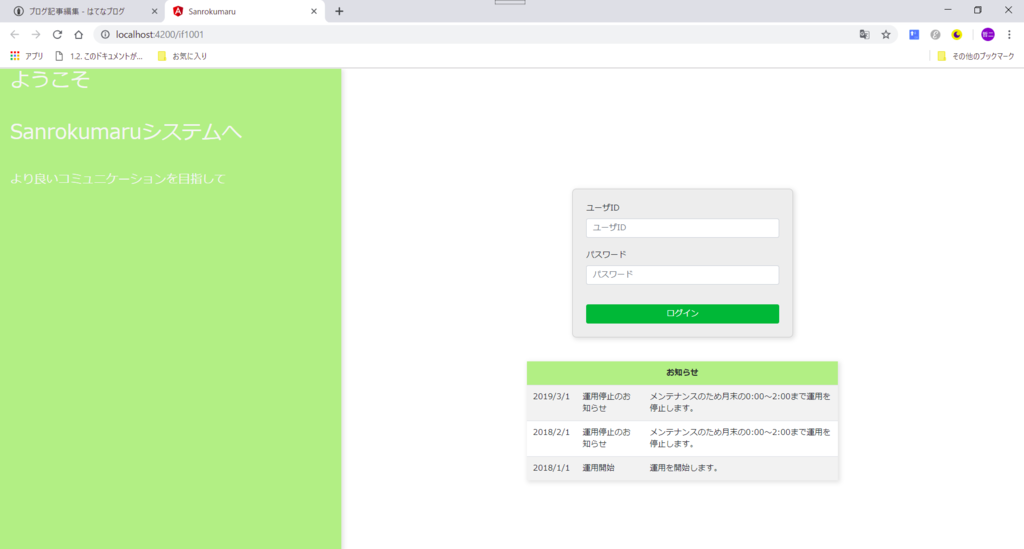
私が個人的に作っているアプリケーションは、下記のようにログイン画面の下にお知らせを表示したいと思っています。

これまではとりあえず Component 内で直接データを作って表示していましたが、今回から Service を追加して Service からデータを取得するように書き換えます。
わたしの環境は app の下に service/information フォルダを作っているので、そこに information(お知らせ)サービスをつくります。
CLIコマンドは下記です。
ng generate service service/information/information
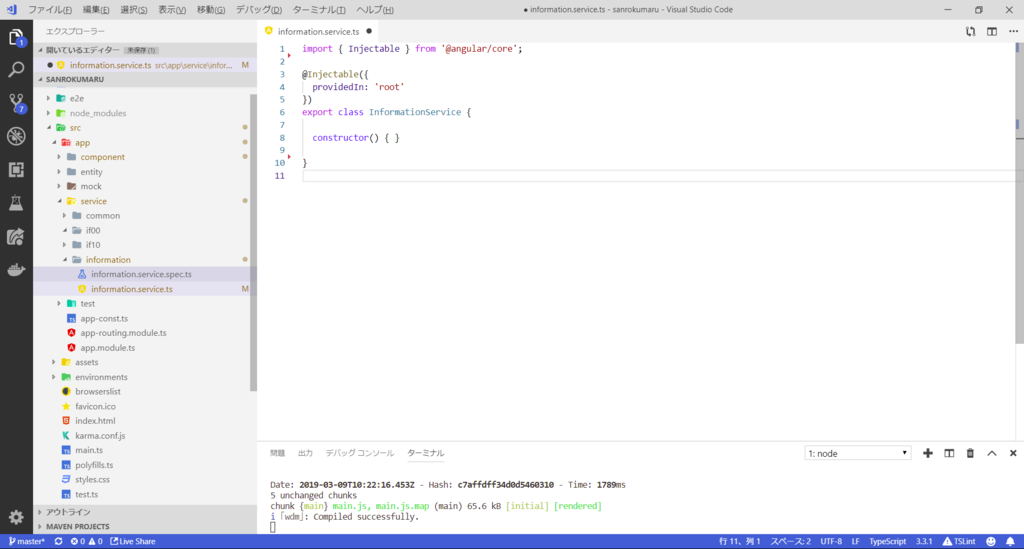
app/service/information 配下にファイルが2つできました。
information.service.spec.ts
information.service.ys
VSCodeでみると下記のようになります。
最近「Material Icon Theme」というプラグインをVSCodeに入れました。
画面左側エクスプローラーのフォルダやファイルアイコンが良い感じになっているでしょう。

その他、モック追加
Angularのチュートリアルを見るとヒーローサービスを作るときにモックヒーローを作ってますね。https://angular.jp/tutorial/toh-pt4
同じように インフォメーションのモック mockInformation を作ってみます。
ng generate class mock/mockInformation
固定値を返すだけなので "class" を作成します。
mock-information.spec.ts
mock-information.ts
これは固定値を返すだけなのでテスト不要。
そのため mock-information.spec.ts はいったん削除しました。
mock-information.ts の中身はこのような内容です。モックなので固定値です。
import { Information } from '../entity/domain/information';

export const INFORMATIONS: Information[] = [
  { date: '2019/3/1', information: '運用停止のお知らせ', detail: 'メンテナンスのため月末の0:00~2:00まで運用を停止します。' },
  { date: '2018/2/1', information: '運用停止のお知らせ', detail: 'メンテナンスのため月末の0:00~2:00まで運用を停止します。' },
  { date: '2018/1/1', information: '運用開始', detail: '運用を開始します。' }
];
インフォメーションサービスの書き換え
最初にCLIコマンドで作った informationService の内容を書き換えます。
下のように。
Observable でモックインフォメーションを返すようにします。
import { Injectable } from '@angular/core';
// ↓追加
import { Observable, of } from 'rxjs';
import { Information } from 'src/app/entity/domain/information';
import { INFORMATIONS } from 'src/app/mock/mock-information';
// ↑追加

@Injectable({
  providedIn: 'root'
})
export class InformationService {

  constructor() { }

  // ↓追加
  getInformations(): Observable {
    return of(INFORMATIONS);
  }
  // ↑追加

}
ログインコンポーネントの書き換え
ログインのコンポーネントも書き換えます。
コンストラクターで informationService をインジェクトして、初期化時に informationService の #getInformations() メソッドを呼び出します。
これもチュートリアル通りです。
import { Component, OnInit } from '@angular/core';
import { Information } from '../../../entity/domain/information';
// ↓追加
import { InformationService } from '../../../service/information/information.service';
// ↑追加

@Component({
  selector: 'app-if1001-login',
  templateUrl: './if1001-login.component.html',
  styleUrls: ['./if1001-login.component.css']
})
export class If1001LoginComponent implements OnInit {

  // ↓コンストラクタは書き換え(infomationServiceを DI するように)
  constructor(private infomationService: InformationService) { }
  // ↑書き換え

  // ↓追加
  // お知らせ
  informations: Information[];
  // ↑追加

  ngOnInit() {
    // ↓追加
    this.getInformations();
    // ↑追加
  }

  // ↓追加
  getInformations(): void {
    this.infomationService.getInformations().subscribe(Informations => this.informations = Informations);
  }
  // ↑追加
}
これでコンポーネントにサービスを追加できました。
今日の感想
今日は Angular のサービス追加について書きました。
ほぼチュートリアルをまねただけに終わってしまいましたが、しばらくはなれていたので思い出すのにはちょうどよかったと思います。
次回はモックでなく、HTTPで実際に通信してデータを取得するようにサービスを変える予定です。
では、お疲れ様でした。